Happy new year everyone, I decided to take some much needed time off to close out last year, but now I am back in the studio and putting the finishing touches on my latest project.
This work is the next progression in my "Ray-shaped" series. It builds on what were mostly superficial knife design references from my RR212 piece, and brings them into a more functionally familiar space.
As with all my knife inspired works, I want to start by repeating a phrase I have written often. “I am not a knife maker”.
When I say that, I simply mean that I am a sculptor taking a sculptural approach to a genre I admire, but do not pretend to fully understand. That sort of thing can take a lifetime, so I feel obligated to say that I am just a visitor, not a resident, of knife-land.
With that said, I find myself circling knife design often, and so have endeavored to dip my toe in once again with the goal of saying something new about a craft with a very long tradition.
So lets get started. This piece borrows from the mechanics of your standard issue folding knife, probably the first one you might have had as a kid. Specifically, it uses a slip-joint to articulate a tail-like feature that folds out of the work, either by pulling hard enough to overcome the spring, or when you depress a lever.
Originally, I thought I might make the tail a locking feature using a what is called a back-lock arrangement that would hold the tail firmly in place once open. However, I settled on a slip joint because it provides a third neutral position for standing the work up in interesting ways, as well as just working better in terms of tactile response and some other fidgety qualities.
Also, a firm locking mechanism would have made it a better piece of art to truly stab something with. That is not really what I want my art to be about, contrary to how some of my pieces have looked over the years. So I went with the more versatile mechanic.
However old the slip joint design might be, I still tried to put my own mark on the mechanism (see video above). Traditional slip joint knives use a rigid metal spring of some variety to provide tension to the lock. However, In place of a proper spring, I have taken the opportunity to use magnets to provide the opposing force in the mechanism. Magnets are better suited in this piece because they provide better haptics to the lock bar. I worked up my prototype thinking I was some sort of pioneer because I had never seen such a knife, but that didn't last long
I had assumed this type of spring would be completely impractical in a real knife because magnets tend to attract debris if kept in a pocket and used out in the world (especially for a metal worker), but after discussing my working prototype to a collector friend of mine, he kindly corrected me, and directed to a knife design that already uses a similar principle, but takes it into some very clever territory.
All of this is to say, when an ideas time has come, it has come. Regardless of how practical this arrangement might be in a real knife–for a piece of art like this, the magnets work really well. Not too firm, and just click-y enough to give a very unique feel.
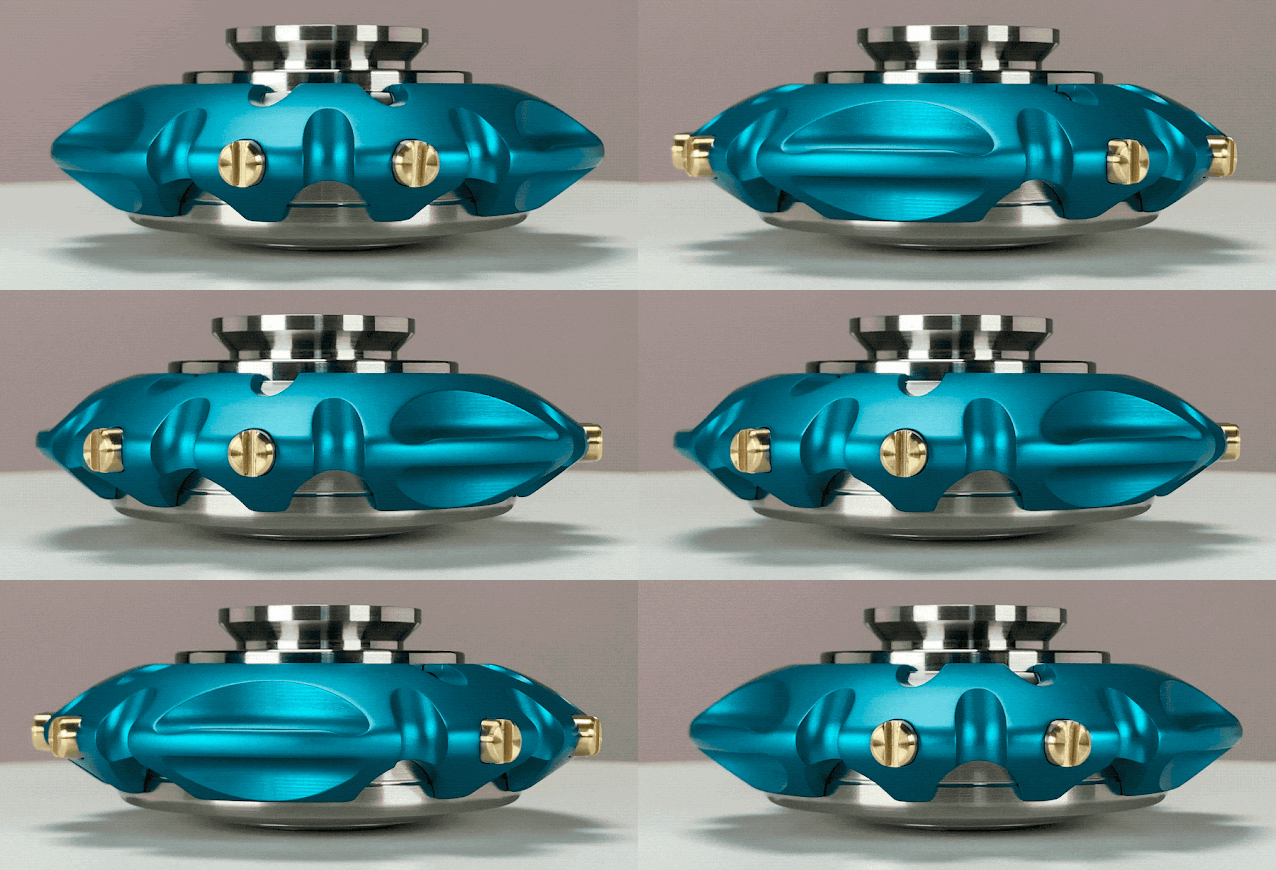
On the design front, I am usually a bit coy about my visual allusions, but I think it is pretty obvious that I am working with a sort of Ray shape here.
I also went out of my way to relocate the bolt hardware from the sides, where they looked more like a utilitarian adornment, to the front of the piece where they have a more obvious creature feel to them. Moving the bolts to the front was both a visual and engineering challenge and really brings some charisma to the piece.
And of course there is the tail. I felt that since this is knife inspired, one might assume the fold out should be a proper blade. But it is not really my style to be so obvious. Instead, I have produced a more ambiguous convex spike shape. I think it serves well as both a tail and a blade-form without being too much of either.
Turning this pointy bit required me to build a fun little arbor to align this unruly shape with the center line of the lathe.
More on the engineering front: I took a number of extra steps to lighten the weight of this piece to balance how well the tail can support the weight of the work. For starters, the “wing” sections are made in aluminum, which is very lightweight. I did some extra hollowing out on the hidden side to lighten them even further.
I specifically wanted them to be aluminum as well because this piece was screaming for some bold colors. That dark blue is actually a deep deep grey dye that takes on a battleship blue or denim color when left to fully saturate.
I also tried making the tailpiece and lock-bar out of titanium, thinking maybe I would have an opportunity for further anodizing, and because it to is much lighter than stainless steel.
But, although I already knew this, it turns out that titanium has very poor sliding qualities and is too prone to galling to work here. I somehow thought I could get away with it, but I underestimated how poor the sliding action between two titanium parts would truly be. It felt downright gross. so I scrapped that idea and switched to stainless steel for the sliding parts.
This created a much friendlier bearing surface.
For the pieces that I will refer to as “the liners” I prototyped in aluminum, and then worked up a pair in titanium and stainless steel. Both stainless and Ti presented unique challenges here.
I ran into some extreme warping issue with the stainless version. Thin stainless steel bar stock has a lot of internal stresses caused by how it is rolled in manufacturing. Once you start cutting into its surface, it loves to curl up like a fish. My first batch of parts warped pretty badly and needed to be bent straight in a press. I know a few ways to mitigate this in the future, however it was a fun to be reminded again of the hidden forces hiding inside various materials.
The titanium version stayed much flatter for me, but this material is prone to work hardening and other general mayhem when machining. My test parts here came out with slightly oversized perimeters, and so there was some fitment issues. But after a little fiddling, I ended up with good parts here as well.
Now I could assess them in the context of the piece.
The titanium liners are lighter, but honestly, I personally like the extra heft of the stainless ones. They feel better to me in the hand. And, it turns out I saved so much weight making the wing parts in aluminum, that this added weight does not seem to be the issue I thought it would be.
There are of course lots of reasons to use the titanium liners, chief among them is that titanium opens the door to further anodizing and colored details. Time willing, I will get to explore that next, as I still have a bit of R&D to do to refine the piece, as well as my processes.
But thats my journey so far, and I was eager to share how this mix of design, engineering, and sentimentality has comes together in a work that feels pretty unique.
Lets call it another great example of my “not a knife” style work.
A note for collectors:Naturally, I am planning to make an edition of these pieces for those interested in adding this work to their collections.
I think I will open the sign up this coming Thursday January 9th (my birthday!) and leave it open for a about a week. Then, as is my way, I will close the books on this piece and set to work. Most of you who collect know the drill at this point.
So look for a sign up email and or links at all of my usual places (My blog, My IG, and email) at 11AM EST.
I will have most of the details sorted out by then and will include extra details on the sign up sheet regarding pricing and options.
In the meantime, and as always, comments and questions are welcome.
I held off on posting this blog for a few weeks because I felt what better way to show off a new work, then to do it while sharing where you can come see it. So if you are going to be in the Miami area during Art Week and/or Art Basel, come check out my exhibition at the Phase gallery at Moonlighter FabLab. It is just a stone's throw from the convention center.
This show is the second stop on my slow motion book tour, which is to say I am not super keen on simply hawking an art book, so I’d much rather turn the opportunity into a traveling exhibition where everyone can come see me, the book, as well as all of the work itself.
The opening for this exhibition is timed to coincide with Miami Art Week and Art Basel, so if you are traveling that way for either of those, do drop by, say hello and yes maybe get a signed copy of my new book while you are at it. You can reserve one if you RSVP for the opening reception on Thursday December 5th.
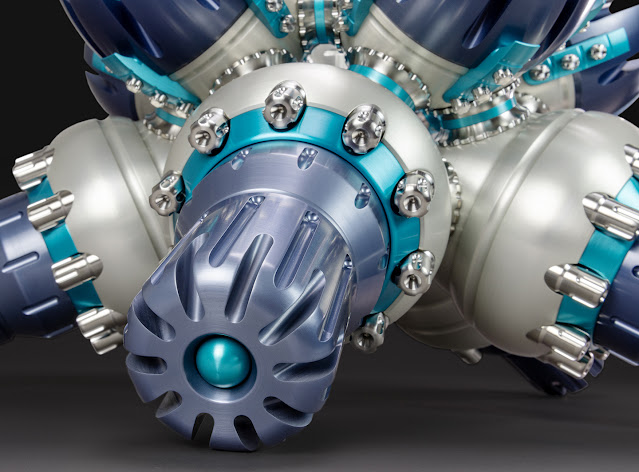
You can be sure I will continue to plug the show a bit more, so…..with the exhibition announcement out of the way, let's talk about this new sculpture. It's called BM 414162522242621331
I suppose you could say that superficially, this work is a scaled up version of my Mod4 module series. But anyone who knows my work knows that kind of concept is simply a starting point for a completely new piece with different goals and considerations. Scaling a work is akin to continuing a conversation, but not necessarily repeating the same words.
For starters, aside from the basic geometric composition, there are no parts that are a direct 1-1 scale of the original piece. That means every element is completely re-engineered.
What the large and small works share visually is intentional, but it is an allusion, not a copy.
The work maintains a radial symmetry, while abandoning one plane of lateral symmetry. Scaling the piece allowed me to open up the composition, to reach inside and approach assembly in a different manner. Whereas the small work is light enough to be assembled using only magnets, this work has large bolts that thread through the inside of each module. This meant creating clearance for both the bolts, my hand and a very very small socket wrench.
This opening up also introduced new sight lines and a means to bring the eye into as well as around the work.
There are a lot more details on this piece, but they are not strictly ornamentation. I had a lot of fun playing with overt assembly methods which lend a certain utilitarian-ness to the work.
The video above details some of my trials and tribulations with some of the assemblies.
Sadly, a lot of the video I shot during the photoshoot was no good, but I pieced together something reasonably workable for a demo as well.
Lots of great details on this one
Eventually I will get the final drawing for this work together, but I like to give myself more time after a large work is completed to refine such a large document. Rest assured it will be ready in time for the opening reception.
Thanks for reading, and as always, comments and questions are welcome.
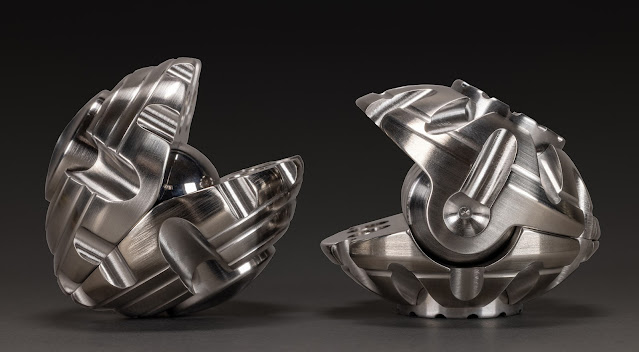
Hello all, it's that time again. Today I am introducing what I am calling...simply...the RR 212371.
(If you are unfamiliar with my naming scheme, that is just my way of encrypting titles so that interpretations don't get muddled by more literal naming schemes)
This piece weaves a number of ideas and influences into one deceptively simple design.
For starters, like many of my pocket art pieces, it is a kinetic piece with a series of rollers that reward your curious thumbs as you handle the work.
Perhaps some might consider rollers less novel than some of my other mechanics, but it is (in my opinion) expert in its implementation for its contribution to the aesthetic and its tactility.
This piece also contains a number of allusions to knife making forms.
Even though I am not a knife maker, I am a student of its aesthetics. So I have taken great care with this piece to elevate my relationship with that craft.
There are also visual references to some of my own previous works, or an earlier aesthetic.
On the technical front, I was able to crack a process idea I had been toying with for many years.
I always thought It might be possible to use an offset turning set up–one where the axis of rotation was perpendicular to the axis of symmetry on the piece–as a design constraint to derive a novel geometry.
I had tried to design around this on a number of occasions with little progress until now. Work-holding was always the biggest obstacle with previous attempts. But the necessity of using a split design to allow me to properly nest the rollers helped me solve it. And it did so in a way that presented nearly all of the visual opportunities I listed above.
In this way, solving a new problem, helped me solve an old one.
The video above does a good job of explaining what I mean.
As I also touch on in the video, in my mind this piece is not a materials piece, it is a piece about line and form.
It wants to be exclusively stainless steel in my opinion. I can see little reason to break with that at this time outside of maybe making the rollers in brass or bronze so they run a little smoother on the stainless pins.
So if you were expecting a range of wild colors or other materials this time, that will not be forthcoming. Less is definitely more for me with this design.
To wrap up, I am just so pleased I was able to pack so much into this little piece. There is a perfect blend of utilitarian notes, vague creature feel, implied functionality, and real functionality. It really represents the whole language I have been building over the years in a way that I can so rarely capture.
What a gem.
Overall dimensions on this work are approximately 2.5"x2.25"x1"
Note to collectors: I am definitely going to make an edition of this work, as I want to spend some time with the design. So if this is a must have for your collection, expect a sign up next week.
The sign up for this work will open on Monday July 29th at 11 AM EST. I will send out the link through my usual channels (email, the blog, IG etc)
Figure on a one week order window and then the books on this work will close forever.
I know everyone wants to know the pricing on new works, but that is my job to figure out between now and the sign up (it is always more complicated than you think). So mark your calendars and I will have that info sorted out by sign up day.
Thanks as always for your eyeballs and your patronage. And as always, comments and questions are welcome.
Lastly, lastly, I wouldn't be doing my job if I didn't mention I have a new book out this year. The details of which are all at this link (where it just so happens you can also order it)
Hello Everyone This is going to be a proper newsletter with multiple announcements, including new works, exhibitions, and some other exciting news.
But let's start by introducing the Sculptural Mag Vessel.
I had been wondering if I would ever come back to my vessel series, and I got here (as I often do) by accident.
I have been continuing to play around with a number of mechanics for integration into sculptural pieces in the hopes that it will help me talk more about what makes machining so special as a sculptural medium. And, when it all works, it does help a lot.
However just as often I find myself stuck with the kinds of problems that most designers face. That is, some mechanics are just hard to make look good....well, until I remind myself that I am not a designer in the traditional sense.
When I was writing my book, I talked a bit about how the field of design is constrained by the function of the objects that are the focus of the design attempt, and how my process is very different from this. That is, if I wanted to design a cool clock, and I can't get the design to work, I am not bound to continue to try and make a clock. Instead, I can take the parts of the design that are working, and move on to a new function or problem. So the clock in this example is free to become a toaster or lawn mower, or anything else.
All I am saying is I am not constrained by the object, as an artist I am free to change however I want, and in this case, I was struggling to design a new entry in my "Watch Pocket" series, and somehow ended up on a tangent making a rather fascinating vessel piece.
The mechanic I was working on just wouldn’t play nice with my original vision, so I let the mechanic tell me what it wanted to be. Once I realized that, I was able to pull in all of the other influences that fleshed out this beautiful design.
Another constraint (this time an engineering constraint) that I am unbound by is practicality and robustness.
Unlike the other vessels in this series, the mechanic for this piece uses permanent magnets for actuation. That is, the components aren’t moved by a mechanical linkage of any kind, they are forced in and out by changing the orientation (polarity) of magnets on the inner drum of the knob.
This configuration works just fine in an environment of care and consideration, but it is not the kind of thing one would employ for rigorous daily (and dirty) use. Things just might be too easily gummed up. This is true of all of the vessels and mechanical art I have made really. It is just something that is coming into better view for me.
That is, one of the most appealing aspects of a project like this is that one gets to take what would otherwise be an impractical mechanic, one that would be useless in a utilitarian product with more rugged requirements, and place it into the context of a fine art object where it is not only completely appropriate, but supremely desirable.
A magnetic latching system may be too complicated and touchy for the real world, but in the art world, it is an intriguing focal point that can communicate why engineering matters even in the world of aesthetics.
That is what this piece does for me anyway.
The Sculptural Mag Vessel is 3" diameter by 2-3/8" tall. It is a hefty little guy at 20 ounces in its current form.
Note for collectors: I am still very much sorting out the details on how to do a small edition of these works. As far as editions go, this is a very complicated piece.
I want to be sure I preserve some ability to refine this design as I go, but I also know it is important to take care of business in terms of who is interested in adding one of these to their collection.
So while I need a little more time to tinker and figure out how to make a quantity of these that maintains some freedom for me to make each one unique. I am going to open up a sign up later this week so that everyone who is interested can reserve their piece before I commit to specific details and numbers.
Once I have a head count, that should help me determine the scale of the project. So look for a somewhat limited sign up to open on Thursday March 14th at 11 AM EST.
On this sign up, I will outline how this project will unfold and how I intend to make each of these sculptural vessels special for you.
I look forward to hearing from some of you and as always, comments and questions are welcome.
In other news, I want to formally announce an upcoming exhibition of my work at the Fuller Craft Museum beginning May 18th and running until Early November.
This exhibition is in conjunction with the release of my new book and shares its title. This will be a rather large collection of both my larger sculptures, and as many of my little creations as we can cram into cases. It will be a very nice show worth the trip.
The opening reception will be Sunday, May 19 from 2- 5pm. I will be on hand for a brief discussion with the director, to talk shop, and sign books. So if you have been wanting to get your copy of my book signed, now you know where to find me. We will have some extra books on hand as well, so I hope to see some of you there.
Lastly, I’d like to share the news that after much dithering and saving my pennies, I am starting construction on a brand new shop. After 20 years of dwelling in basements to create my work, I am finally going to build something that can properly hold what my studio practice has become. I make it a habit not to talk about things until they are real. But now that there is a giant hole in the ground, it finally feels real enough for me to start posting about it.
My current shop, in the basement of my home, is bursting at the seams. It is an organic space, consisting of thousands of ad hoc solutions and shortcuts piled on top of one another. It is efficient in that I never thought I could fit so many tools, and squeeze so much capability, out of such a modest space. But it is also inefficient in lots of obvious ways. It is cramped, and has limited head room for large tools. Getting stuff in and out is a nightmare, and staying organized when there isn’t enough places to put things is like playing one of those sliding puzzles. I have always liked working within constraints, but it was high time I admit to myself that my current shop, although I love it dearly, is holding me back. So about a year ago, I started working with an architect to build something better.
I have never had a “planned” space. So I am going to take my time building this space out and fine tuning the layout. I have no idea how this will go, but I am excited to haver finally (Finally!) broken ground. It won’t be the biggest machine shop in the world, but by studio artist standards, it is going to be pretty damn sweet. Keep an eye on my Instagram feed if you want to follow along on the progress of the new studio.
And of course, no post would be complete without me reminding everyone that my new book is available in bookstores everywhere, at Amazon.com, and directly from the publisher here at Schiffer books